| 4.0 Word Processing Package | ||
|
4.11.1.2 Adding Shading To
add shading to a table, click anywhere in the table. To add shading to specific
cells, select the cells, including the end-of-cell marks. To add shading to a
paragraph, click anywhere in the paragraph. To add shading to specific text,
such as a word, select the text.
Note: You can use the Table AutoFormat command to add
borders and shading to a table automatically. 4.11.2 Adding Headers and
Footers Headers and footers are typically used in printed documents. You can create headers and footers that include text or graphics — for example, page numbers, the date, a company logo, the document's title or file name, or the author's name — that are usually printed at the top or bottom of each page in a document. A header is printed in the top margin; footer is printed in the bottom margin. You can use the same header and footer throughout a document or change the header and footer for part of the document. For example, use a unique header or footer on the first page, or leave the header or footer off the first page. You can also use different headers and footers on odd and even pages or for part of a document. Add a header frame
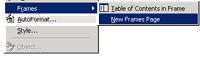
On
the Format menu, point to Frames, and then click New Frames page. On the Frames toolbar, click New Frame Above. Drag
the border until the frame is the size you want. Position headers and footers
You can change the horizontal position of headers and footers — for example, center a header or footer, or align it with the left or right margin. You can also change the vertical position of headers and footers by adjusting the distance from the top or bottom edge of the page, as well as the amount of space that appears between the document text and the header or footer.Adjust the horizontal position of a header or footer
On the View menu, click Header and Footer. If
necessary, move to the header or footer you want to adjust. On the Formatting
toolbar, click an alignment button.
Tips 4.11.2.2 Switching Between Header and Footer:
4.11.2.3 Formatting the Header and Footer
To
view a header or footer, switch to print layout view. To edit or format a
header or footer, you need to display the header or footer you want. On
the View menu, click Header and Footer. To move to the header or footer you want, click a button on the Header and Footer toolbar. Make
your changes to the header or footer. When you change a header or footer, Word automatically changes the same
header or footer throughout the entire document. To change a header or footer
for part of a document, divide the document into sections and break the
connection between them. When you create a header or footer, Word automatically
uses the same header or footer throughout the entire document. To create a
different header or footer for part of a document, divide the document into
sections, and then break the connection between the header or footer in the
current section and the previous one. If you haven't done so already, insert a section break where you want
to start a new section that contains a different header or footer. ? Click in the section for which you want to create a different header or
footer. 1.
On
the view menu, click Header and Footer. 2.
If
necessary, move to the header or footer you want to change. 3.
On
the Header and Footer toolbar, click Same as previous 4.
Change
the existing header or footer if create a new on for this section? Word
automatically makes the same changes to the headers or footers for all
subsequent sections. 5.
To
create a different header or footer for a subsequent section, repeat steps 1
through 4. Tip: In print layout view, you can quickly switch between the header or footer and the document text. Just double-click the dimmed header or footer or the dimmed document text. | ||||


|
Copyright © 2001 Selfonline-Education. All rights reserved. |
||
| |
||