|
9. Creating a User Defined ActiveX
Control
3.
Placing
the
ActiveX
Control
in
the
Microsoft
Excel
97:
Open
Microsoft
Excel
Worksheet. From
the
View
menu
select
Toolbars
item. Then
select
Control
Toolbox
option. The
control
box
will
appear,
floating
over
the
spreadsheet. At
the
bottom
of
the
control
box,
you
will
see
an
icon
with
a
crossed
hammer
and
wrench. If
you
click
this
icon
the
ActiveX
component
Menu
will
appear. Select
the
item
rproj.rform. The
menu
will
disappear
and
the
cursor
becomes
a
crosshair
and
will
allow
you
to
draw
the
ActiveX
control
on
the
Spreadsheet. Exit
from
the
design
mode
by
clicking
on
the
Design
Mode
Icon
which
appears
in
the
beginning
of
the control
box. The
ActiveX
control
becomes
dynamic. You
can
select
a
gif
file
and
display
it
in
the
picture
box
as
shown
in
the
figure
10
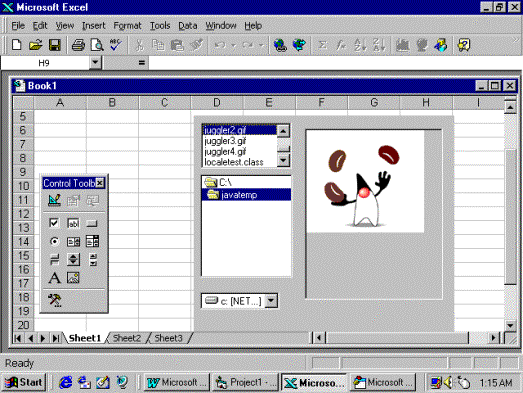
Figure
10
4.
Placing
the
ActiveX
control
in
the
Microsoft
Word
97
Document:
Open
Microsoft
Word
and
open
a
blank
document.
From
the
view
menu
select
Toolbars
and
then Control
Toolbox. You
will
get
a
menu
of
ActiveX
controls.
Select
the
Control
‘rproj.rform’.
Exit
Design
mode
by
clicking
on
the
design
mode
icon
from
the
tool
box. The ActiveX
control
form
appears
in
the
dynamic
mode. Now
you
can
change
the
directories,
drives
and
files. Select
a
bmp
file
or
gif
file
and
display
it
as
shown
in
the
figure
11
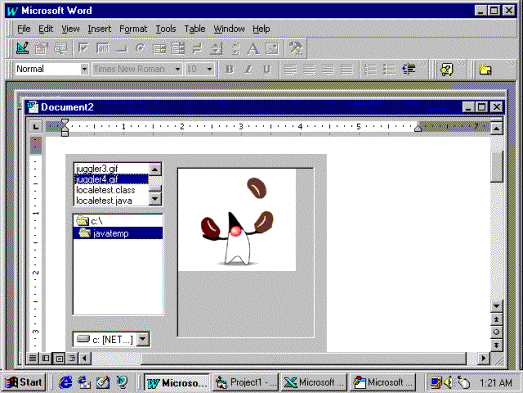
Figure
11
   |